Hello my crafty friends. Ever since I discovered the wonderful world that is Lettering Delights, I've always wondered about whether I should buy the SVG set (Or Cut-Its Set) or the graphic set. I'm sure you've wondered what the difference is... as have I.
I've recently discovered that both can be used for each other's respective function. An SVG can be converted to a file to be used as a graphic, and vice versa. I've found that using the SVG (or cut file) and converting it to a graphic would be easier than the latter. Although I have not tried the process the other way around, the SVG to PNG was quite simple with the help of Inkscape. = )
I did the conversion in my recent post about Christmas Tags. It was easy enough to convert an SVG from the Lettering Delights Merry Stitchy Set into a PNG file to use for the Print-and-Cut tag project.
So, if you ever find yourself wondering if you should by either, neither, or both, I'd suggest the Cut Its. But, it really does depend on how you craft. Maybe for certain files that just seem to have too many "pieces" or layers, you might already know that you will only be using the graphic function, and so the practical thing to do would be to purchase the graphic set. Or, if prefer to avoid the hassle of converting, do you buy both?
For me, I like having the option to do both and I don't mind the few extra steps to convert, so I will usually purchase the Cut-Its Set since I've gone through the process of the SVG to PNG conversion.
Anyway, I just thought I'd share my thoughts on Cut-Its Set vs Graphic Set. I'd love to hear your thoughts on this too, so feel free to leave a comment on how you decide what to buy and how you use your Cut-Its Sets and Graphic Sets.
Happy Crafting!

Friday, 23 December 2011
Lettering Delights Holli-Dollar Days SALE!!

Here's a few sets that are on sale now! =)


Happy Shopping and Happy Crafting!! = )
Thursday, 22 December 2011
Christmas Tags = )
Updated with photos of my actual tags.
Hi everyone. I have not gone toooooo far. I've missed blogging these past two weeks. Trust, I've been in blogland -- visiting some of my favorites, like Under A Cherry Tree. Well, a few days ago, I came across one of Jin's fabulous tutorials on making some Christmas tags using Silhouette Studio and the Cameo.
Since I do not have the Designer's Edition (...YET) of the Silhouette Studio, I had to figure out a "knock off" version of Jin's awesome tags!

Before I begin, you should know that I did used a Lettering Delights Cut-it Set, Merry Stitchy. I aslo used Inkscape to convert my files. (Inkscape is FREE.)
1. Start by drawing a rectangle 4" x 2". This would be your guide as to how big you want your tag.

2. Locate your desired cut-it file (in SVG) and open the SVG in Inkscape.

3. I chose Merry Stitchy 11, the Christmas Tree! In inkscape, select all (layers), and you can do this by hitting CTRL+ A. Then right-click and "group." After all layers are grouped, you can then save the file as a "PNG." I kept the file name Merry-stitchy-11, but you can rename to whatever you like. (Note: Please make sure that your image is inside the rectangle workspace. I found that if you save a file and a part of the image is outside the workspace, it will get cut off when it's opened in Silhouette Studio. You may need to adjust the size a bit.)

4. Go back to Silhouette Studio and open your PNG file. (Note: the file will open in a new tab. This is ok. We will copy and paste the image later.)

5. Using the trace tool, select the trace area (the entire image) until the entire image is yellow. I unchecked the high pass filter and set my thresshold to 78%. Select Trace and Detach.
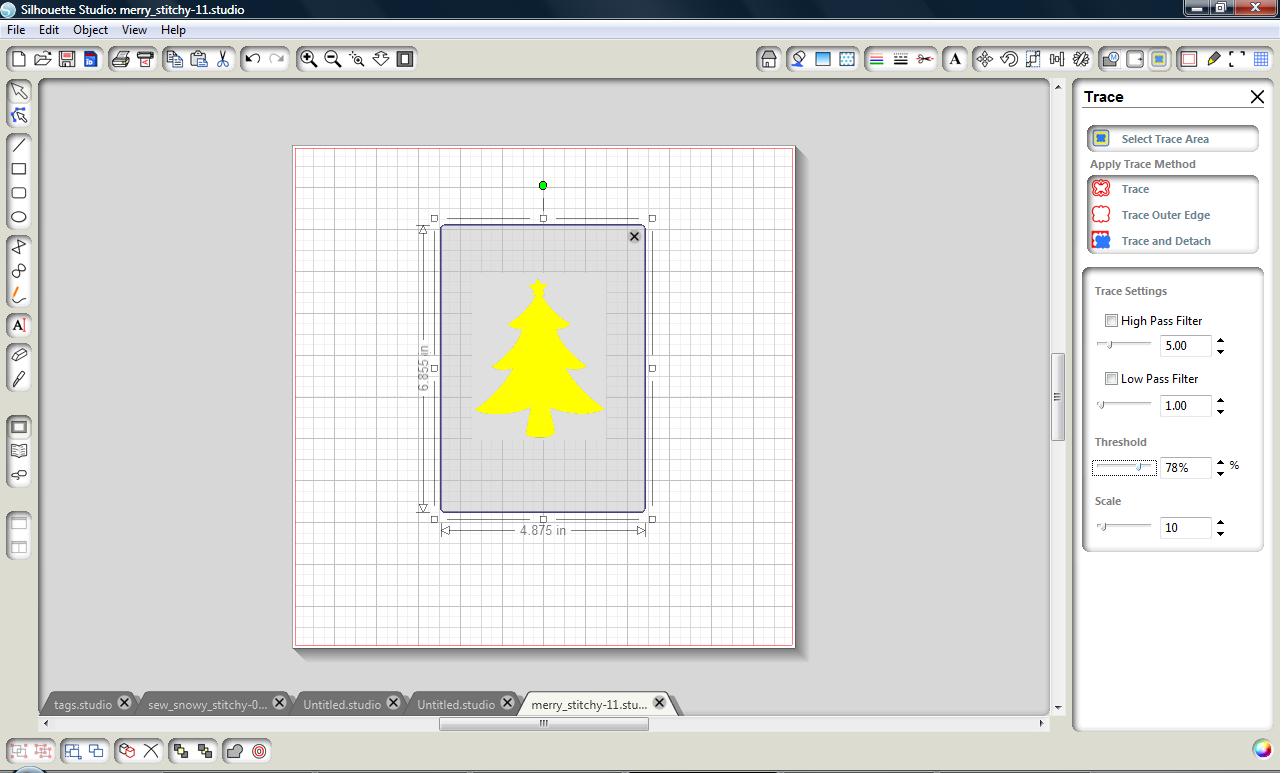
6. Once your trace is complete using the Trace and Detach option, you may drag your image away from the white background that was attached when you opened the image. You can now delete the white background image by selecting it and hitting "delete."


7. Now you are left with just the tree. =) Select the tree and copy it (right click and copy or hit CTRL+ C.)


8. Head over to the original tab you started on and paste the tree there (right-click and paste or CTRL+ P). As you can see, my tree is much bigger than the 4" x 2" rectangle, so just resize to fit. Mine was about 1.9". Then you may select and delete the big tree.

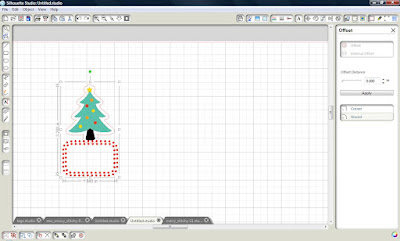
9. Draw a rounded rectangle below the tree, about 1.030" h and 1.745 w.

10. Next, while your rectangle is selected, select the Line Style Tool. You want the small dashes (second option, just below the solid line). You can now play around with the line thickness until you see what you like. Mine is at 5.5 pt. Make sure your End Cap style is "rounded." This will create circles instead of rectangles or squares. (At this point, your original rectangle is no longer needed and you may delete it.)

11. Now it's time to create a shadow layer. Select both images and right-click and hit "offset." (If you have visited Jin's tutorial already, this is where I go back to her instructions and finish the tags.)

12. Because the line style for the rectangle is dotted, the shadow will come out like that too. It's ok. You just select the shadow dots and it turns into a solid line to follow the solid line around the tree.


13. Draw two circles. I made mine 0.3" and 0.1" and placed the small one inside the big one. This is for the hole you will be stringing your ribbon or twine through.
14. Select the two circles and place them on your shadow layer. Mine is at the top. Select just the bigger circle and the shadow layer and "weld" (right-click and select "weld").
15. Select the shadow layer and the small circle and change the line color to a gray (or whatever color you like - it will print with your tag).

16. Next, add your text and fill text in black. You're almost done!!

17. Finally, check your cut lines. Open the Cut Style window and you should see the shadow layer and the small circle lined in red. This will cut. If not, just select the layer(s) that have the red outline and set it to "no cut."

18. You are ready to replicate, print and cut! = )

My camera is going all crazy, so I couldn't take pictures of my actual tags... I'll try and update and post soon.
UPDATED!!


UPDATED!!


Please visit Jin at Under A Cherry Tree for the tutorial that inspired me to make these tags. =) If you have facebook, don't forget to "like" it too! (button is at the bottom of her post). = )
HAPPY CRAFTING!!
Tuesday, 6 December 2011
LD Two for Tuesday Sale!

Add wonder to your holiday projects with this fun little snow themed bundle. Get our Eskimo Kisses SVG and the Basic Snowflakes SVG for one low price! Offer ends next Monday, December 12th at midnight, MST.
And just a few short hours left to save on our Manic Christmas sale! Hurry offer ends tonight at midnight.

Click here or on any of the above photos to get your Two-for-Tuesday deal!
Friday, 2 December 2011
It's a Cracker Box kind of day!
Hello Everyone! I've been playing around with the Lettering Delights sets that I just got Joanna's Pretty Picks Bundle and the Sew Stitchy Cut-its Bundle these past few days, I don't even know where to begin to post up my projects.
I was able to take a picture of the Christmas Favor boxes I was working on using the Cracker Favor boxes Cut-its Set.

Recipe
Cardstock from stash
Stampin up - Baroque Burgundy
My Craft Spot Merry Christmas Stamp Set
Lettering Delights Cracker Favor boxes Cut-its Set and Alpine Snow SVGs
Divine Twine in Cherry Red
Thank you all for stopping by. I hope to have more pics of the tags I have been slaving over! = ) I'm definitely enjoying my new Silhouette Cameo.
Tuesday, 22 November 2011
Lettering Delights Sale - Merci Bear Coup Up to 60% OFF!!
Hi Everyone Lettering Delights is having a Customer Appreciation Sale. Perfect time to get those sets that you've been eyeing at up to 60% off!


SAVE 40% with code Merci2U
SAVE 60% with code MerciBearCoup when you spend $30+
Now's the time to get Joanna's Pretty Picks Bundle! Reg $49, currently $19, $11.40 with code Merci2U!! You cannot beat that!
Lettering Delights 17,000 FB fans FREEBIE and Manic Monday!


Lettering Delights is celebrating 17,000 facebook fans with this freebie!! If you haven't already, please go and "like" Lettering Delights on Facebook. Tell 'em Jamie from Ooh La La Paperie sent you. =)
You may click on any of the images above to go to the Lettering Delights website and grab your FREEBIE or click HERE. Hurry, offer ends December 1 (or December 2, 3:59 PM Guam Time).
MANIC MONDAY DEAL! Get the Fruity Bundle for $4! That's 8 Fruity sets for only $4. Hurry, offer ends Tuesday November 22 (or November 23, 3:59 PM Guam Time).


Happy Shopping and Happy Crafting!
Sunday, 20 November 2011
Lettering Delights FREEBIE!! - Threaded Rosettes Extras
Hola Crafty friends! As usual, I was surfing around Lettering Delights and I stumbled across another freebie. You're going to enjoy playing with this one. It's ROSETTES!! = )


Don't forget, you can save when you buy the Joanna's Pretty Picks Bundle.
Happy Shopping and Happy Crafting!
In case you're going crazy with Rosettes, here's a couple of other Rosette's Lettering Delights is offering. Just check out with your free one above, then go back to Lettering Delights with your discount code from your previous order!
Happy Shopping and Happy Crafting!
Friday, 18 November 2011
Lettering Delights Creative Spotlight : Joanna Wright
Hi Everyone! Lettering Delights is featuring Joanna Wright. Be sure to stop on by and check out her picks for the holiday season. = ) 14 Cut-It Sets for $19! (Reg $49) Steal of a deal!

Here's a sneaky peak of a few of her sets. Just click on the image to go to Lettering Delights.

Happy Shopping and Happy Crafting!!
Lettering Delights Friday Freebie!!
Hi Everyone! Here's Lettering Delights Friday Freebie!! Super, super cute! These 3D Threaded Pumpkins are regularly $2. Hurry! Sale ends Sunday, 11:59 PM, or Guam Time Monday 3:59 PM.

Click HERE to get your 3D Threaded Pumpkins!!
Happy Crafting!
Lettering Delights Freebie!! (REG $6)
Hello my Crafty Friends! So, I was browsing Lettering Delights, and came across a FREEBIE!!!

I just dowloaded this and will be playing with these soon. I'll be sure to post up pictures!
Happy browsing and happy crafting!
Thursday, 17 November 2011
Favors fit for a Princess
Hi Everyone. It's My Creative Time's Throwback Thursday. As usual, I'm always so delayed in posting. I completed this a couple of days ago for a friend. Her little girl has turned 5 and had a birthday party at school.

I used Accent Essentials for the Scallop (3") and circle (2.7"). The tiara was from Storybook and I can't remember if I used the crown from one of the Hello Kitty cartridges, "C" was from Alphalicious.
I used light pink glittery tulle (you can't really see it, sorry for the poor photo as it was taken with my cell phone) and I applied some stickles to the pink crowns/tiaras and letter C for more sparkle.
These plastic cello bags are filled with Wild Berry skittles. =)
Thanks for stopping by! Have a fabulous day.
Friday, 11 November 2011
$11 Cut Its Bundle (reg $55)
Don't forget to SHOP the Lettering Delights Veteran's Day Sale! 111 items priced at just $1.11 and a Cut Its Bundle for $11 (reg $55).

HAPPY SHOPPING!!
HAPPY SHOPPING!!

Saturday, 29 October 2011
My Creative Time DT Call
Hi everyone!
I just found out that Ms. Emma over at My Creative Time is having her very first DT Call! So excited for the opportunity. I made a really quick project to link up for the Call.
I was inspired by Ms. Emma's giftcard die when I though to make this.
I just found out that Ms. Emma over at My Creative Time is having her very first DT Call! So excited for the opportunity. I made a really quick project to link up for the Call.
I was inspired by Ms. Emma's giftcard die when I though to make this.
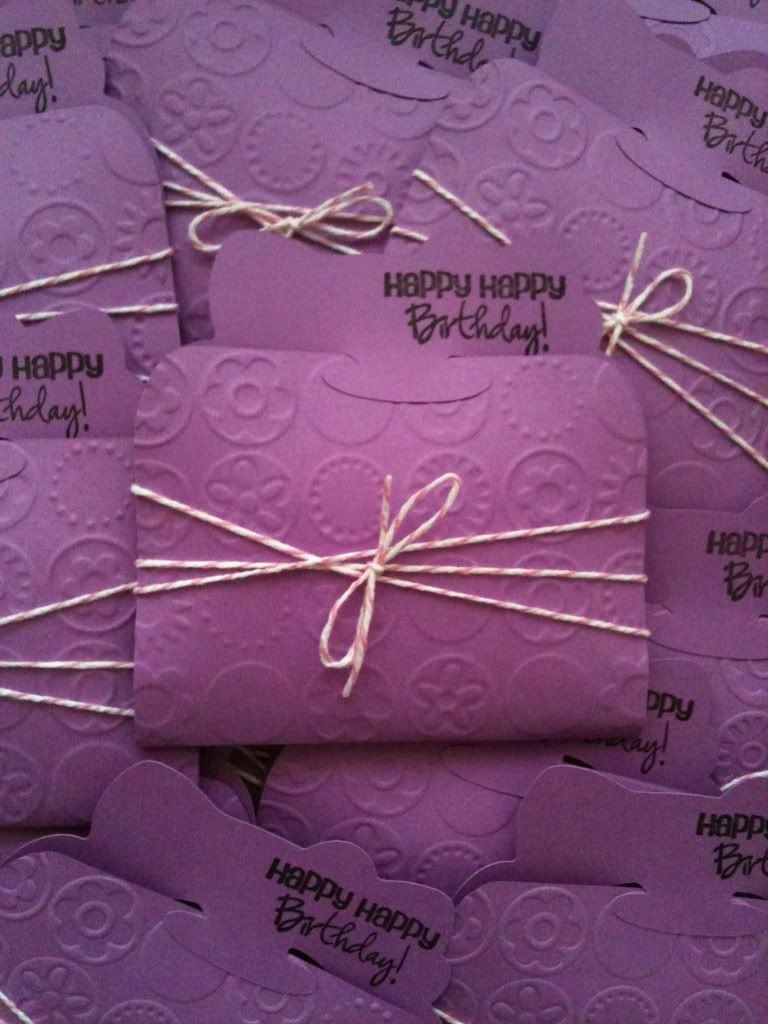
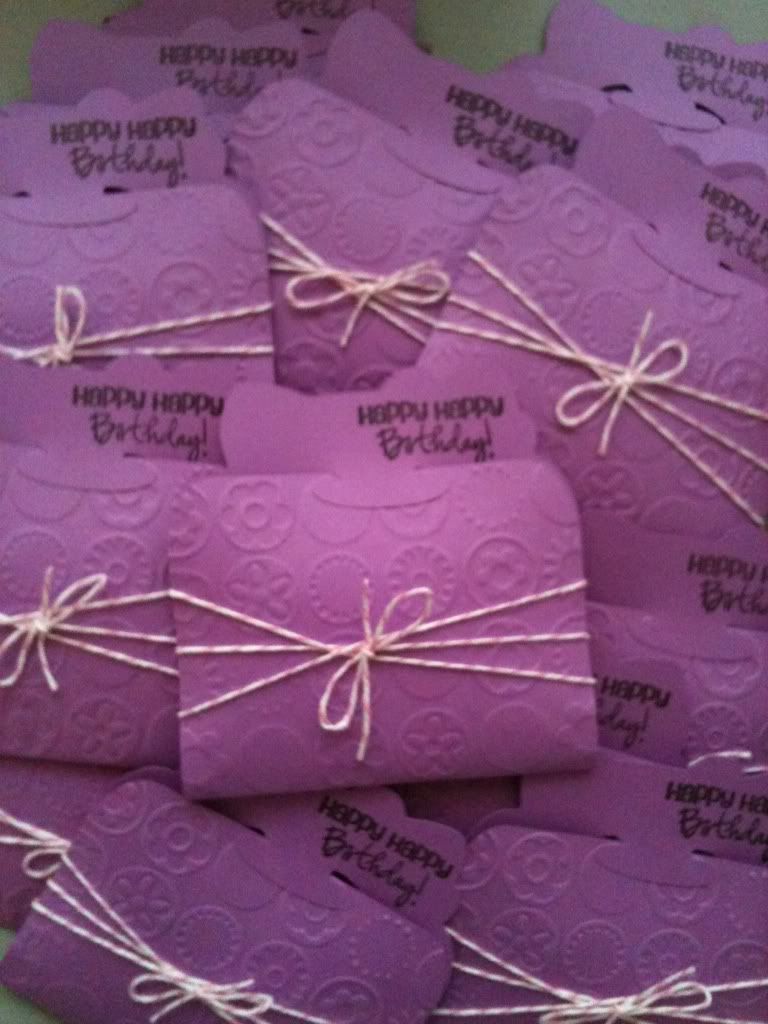
It is Hello Kitty's head on the "header" of the gift card holder, then it became a treat holder. There's a fun-size package of skittles in there. For the sentiment, I stamped "Happy Happy Birthday" from My Creative Time's "Wow so many candles!" Set. Click here to view all her products for purchase.
The purple paper is plain cardstock from my stash, which I embossed with my cuttlebug. I can't quite remember the name of the folder, but I'll check in a bit and update as I figure it out. To finish it off, I tied my holder with some Cotton Candy Pink Divine Twine. =)
Wish me luck! Have a fabulous, crafty day!
Friday, 21 October 2011
Last minute Throwback Thursday
Hi everyone! Just posting up a quick project so I could link up for My Creative Time's Throwback Thursday Challenge.
Recipe to be added later. I used the HK Greetings for this one.
Enjoy!
Recipe to be added later. I used the HK Greetings for this one.
Enjoy!
Friday, 7 October 2011
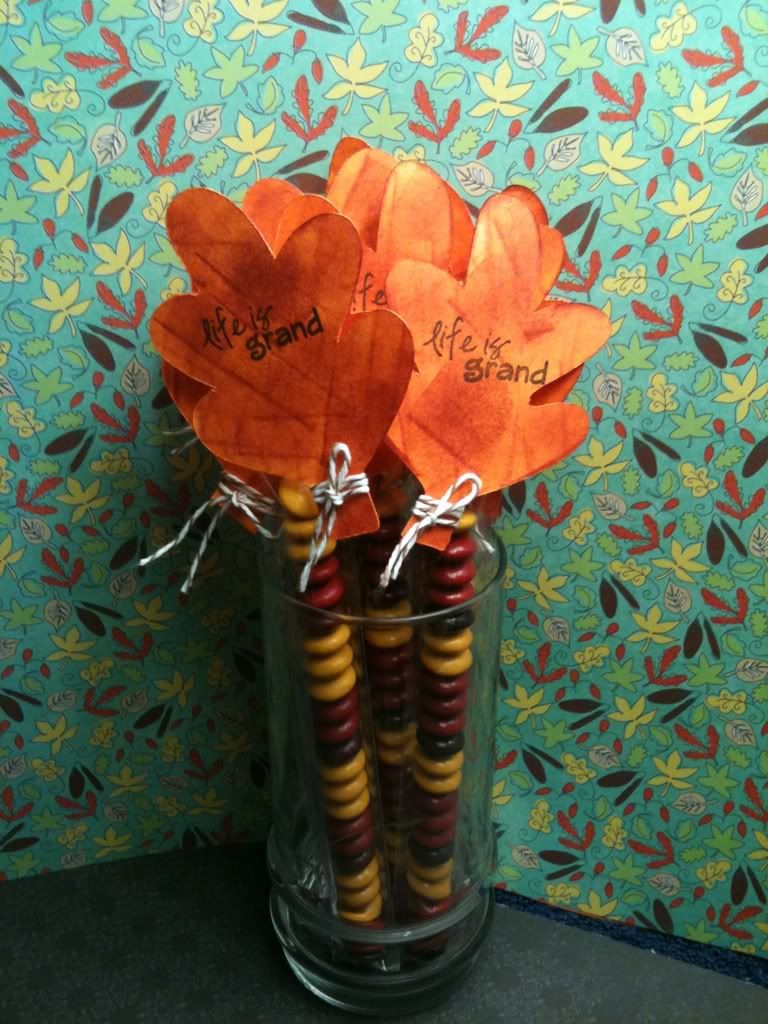
Life is Grand!
Hello friends! Today I'm sharing a quick fall treat with you. I saw these super cute M&M candy sticks several months ago and I've been wanting to do it... so here it is! Perfect time to play along at Gettin' Cricky for their Simply Sunday Challenge. I'm also linking this up for My Craft Spot DT Call. Please hop on over there to visit the talent that is trying out, You may find some awesome blogs to follow. I did. : )
Recipe
Paper - Orange Cardstock from stash
Ink - Stampin' up Baroque Burgundy, Inkadinkadoo Black
Stamps - K. Andrew Design Stamps Positive Thoughts
Cricut Cartridge - Doodlecharms
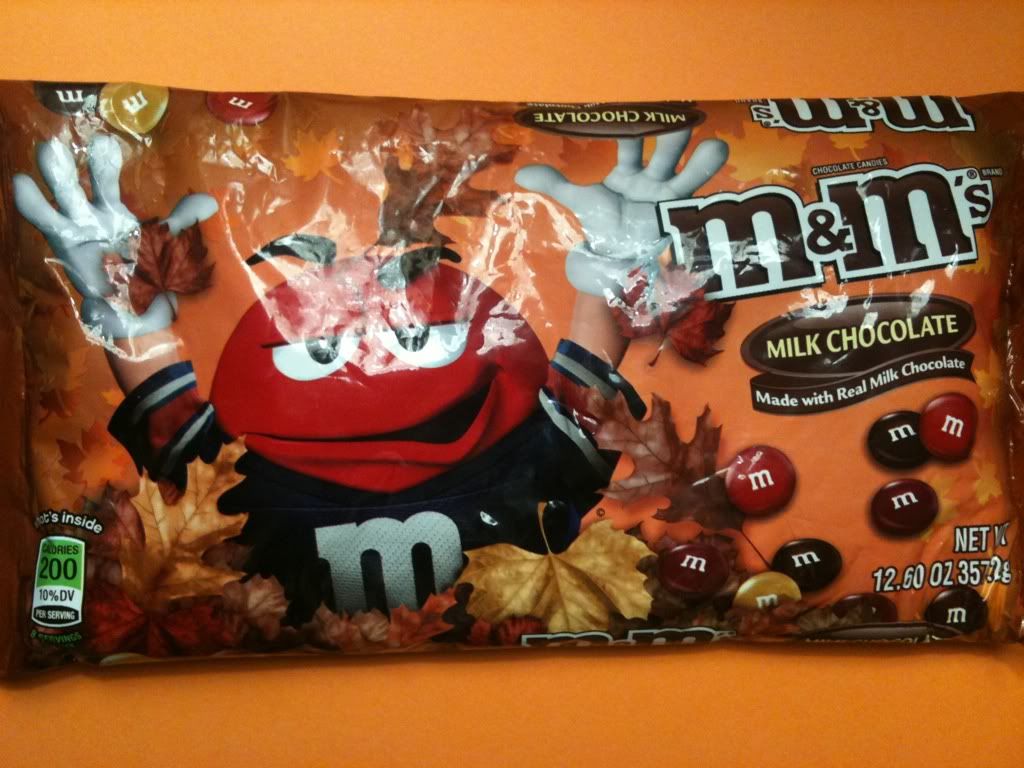
MISC - Divine Twine brown sugar, double-sided tape, 1" x 8" cello bags, Fall M&Ms, make-up sponge
While standing in line at the grocery store, these awesome bags of Fall M&Ms caught my eye! I was so excited because then I wouldn't have to sort through regular M&Ms and pick out the browns, oranges and yellows...
To start, I used MyCutSearch.com to figure out which cartridges had any Fall-themed cuts. I knew I wanted to use a leaf so I keyed that in the search bar. After going through which cartridges had leaves and which cartridges I had in my own library, I decided on the Doodlecharms leaf.
Off to filling up the cello bags I went... It took me a while, only because my two-year old was desperate to help and was sneaking some of the candy. To fill the bag, I used a chopstick to get it open and press down on the M&Ms as they were dropped in to make sure they were in order. After the first couple of M&Ms, they pretty much "fall" in line perfectly.
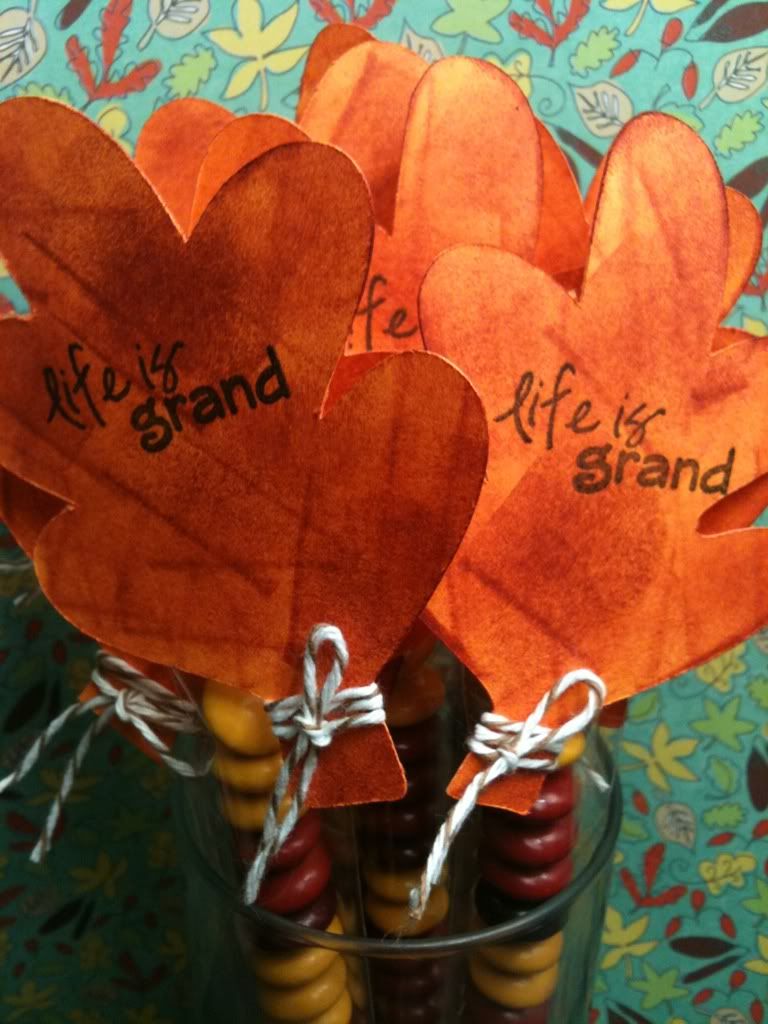
I cut out both the shadow and black out leaves just to have a mix. They were cut out at 3."
After I had cut them all out, I inked them using a make-up wedge sponge with the Burgundy to give it a blended fall look. I have tried using the kitchen sponges, paper towels, toilet tissue, but I found that the make-up wedges blend the best. Plus, they're super cheap -- it's like $3 for a pack of 20+. (Also, I don't own a dauber.)
Next, I stamped on my Sentiment from K. Andrew Designs Positive Thoughts in black Inkadinkadoo in the center. Then, I tied the bottom off with some Brown Sugar Divine Twine, stuck the leaves on my M&M sticks with double-sided tape (because I couldn't find my pop-dots).
Have a fabulous day!
Subscribe to:
Posts (Atom)